Importing spent time from CSV in Redmine
Created on 2022-03-23
•

(Supported versions: Redmine 4.1 or later / RedMica 1.0 or later)
In Redmine, you can create many spent time entries at once with CSV import.
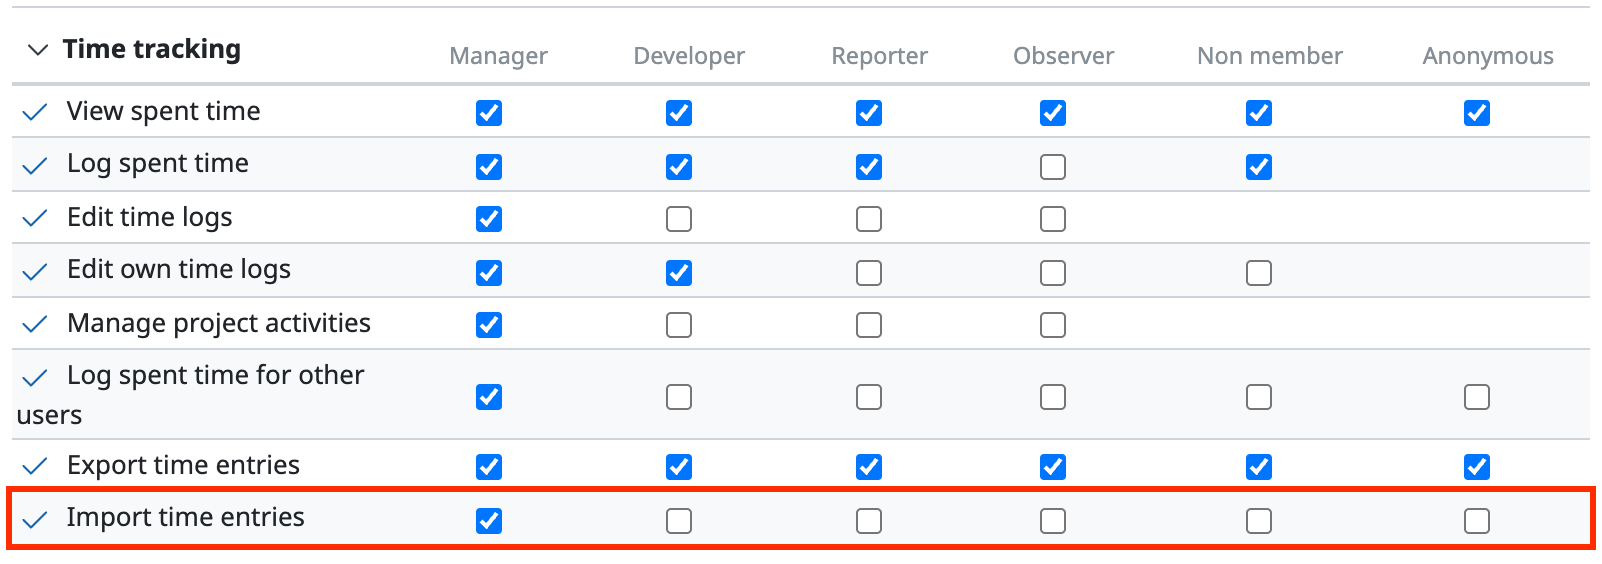
To run an import, you need the "Import time entries" permission. By default, only the "Manager" role has this permission. You can check and change the assignment of permissions in "Administration" → "Roles and permissions" → "Permissions report".
Steps
1. Create a CSV file
Create a CSV file for the import.
Note: You cannot mix more than one project in one CSV file.
To log spent time for an issue, specify the issue number (see the Issue column in the figure above)
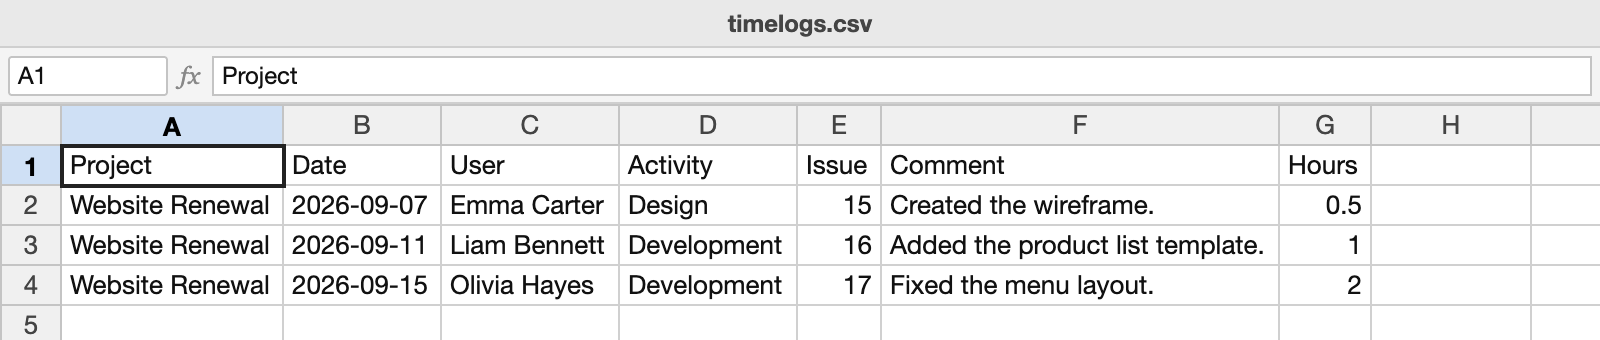
The following fields are required. Always specify their values in the CSV file.
- Date
- User
- Activity
- Hours
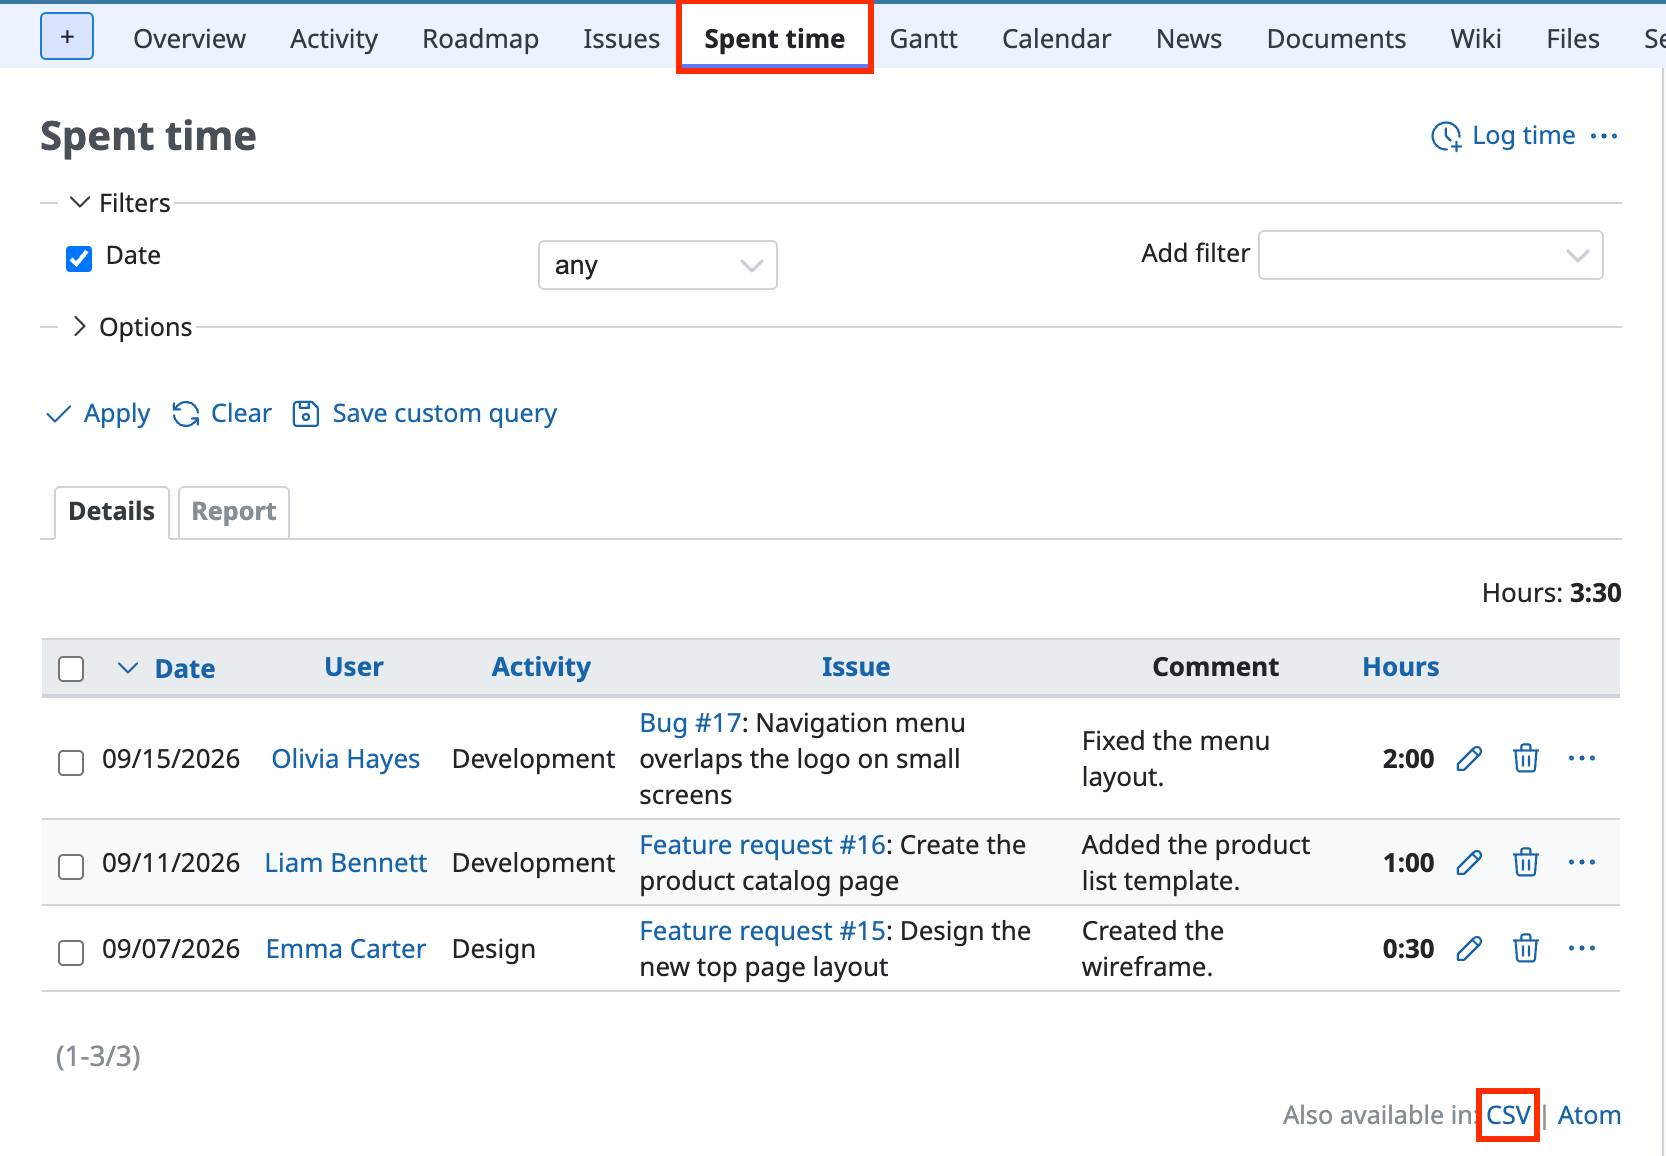
If spent time is already logged in Redmine, you can create the file more easily by using an exported CSV file as a template. To export it, click "CSV" at the lower right of the spent time list ("Spent time" in the project menu).
Reference: Exporting spent time to CSV in Redmine
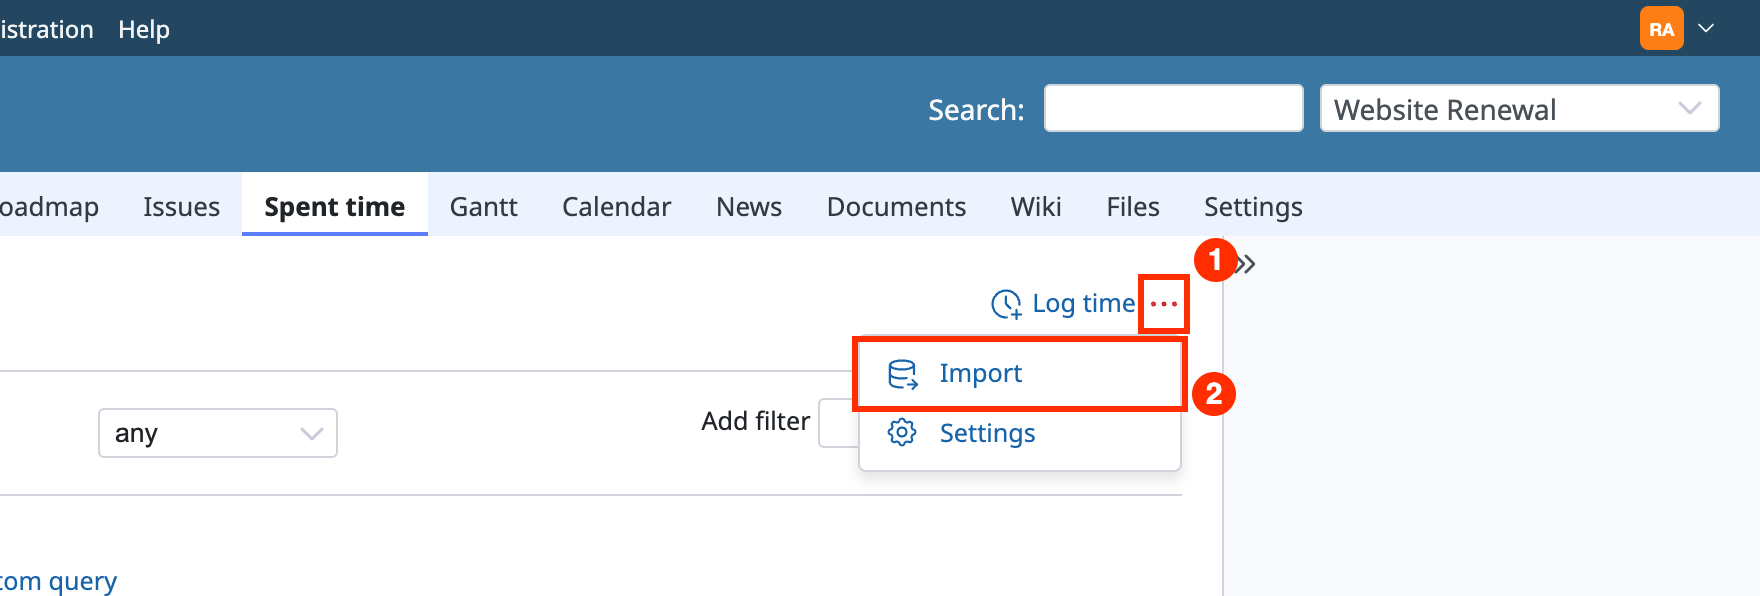
2. Click "…" → "Import" at the upper right of the spent time list
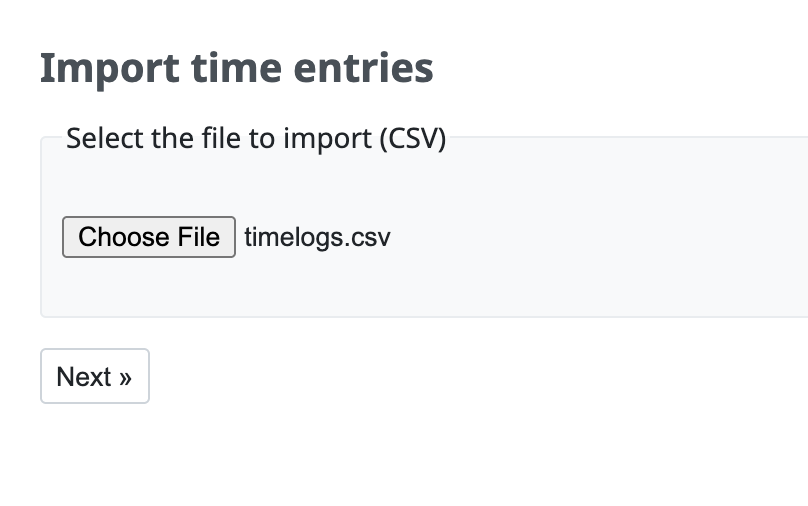
3. Click the "Choose File" button and select the CSV file that you created → click the "Next" button
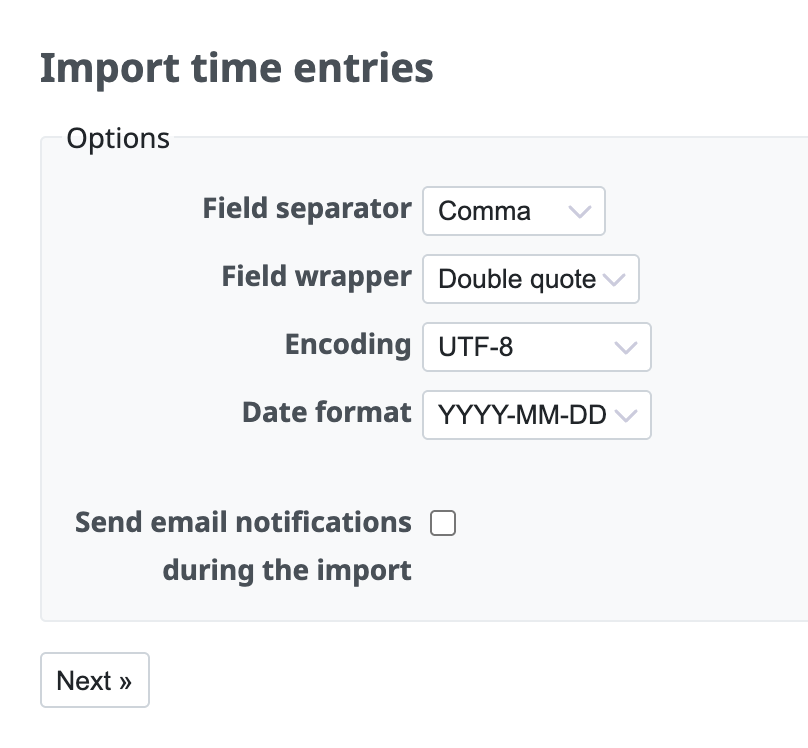
4. Specify the options to match the format of the CSV file that you created → click the "Next" button
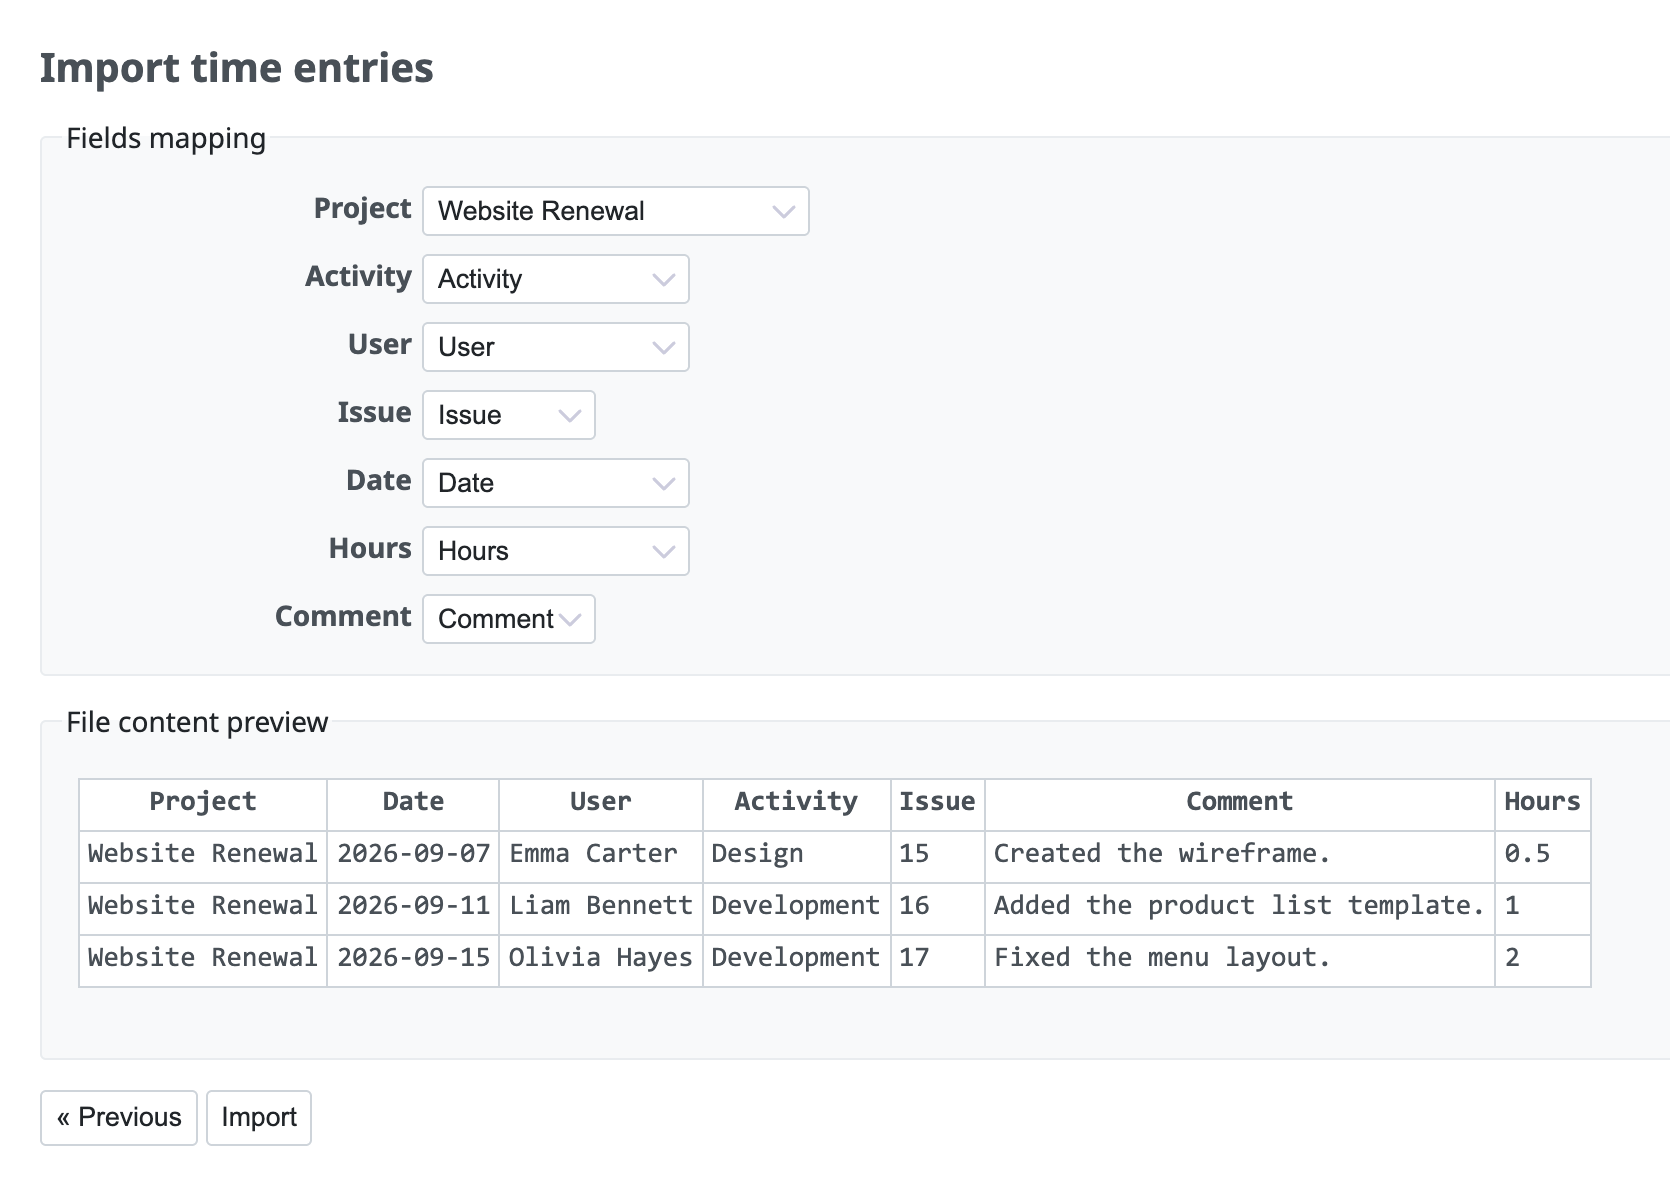
5. Specify the field mapping → click "Import"
Redmine automatically sets which spent time field (Date, User, Hours, Issue, Comment, and so on) each column in the CSV file corresponds to. Check that the target project is selected in the Project field and that the mapping of each field is correct. Then click "Import".
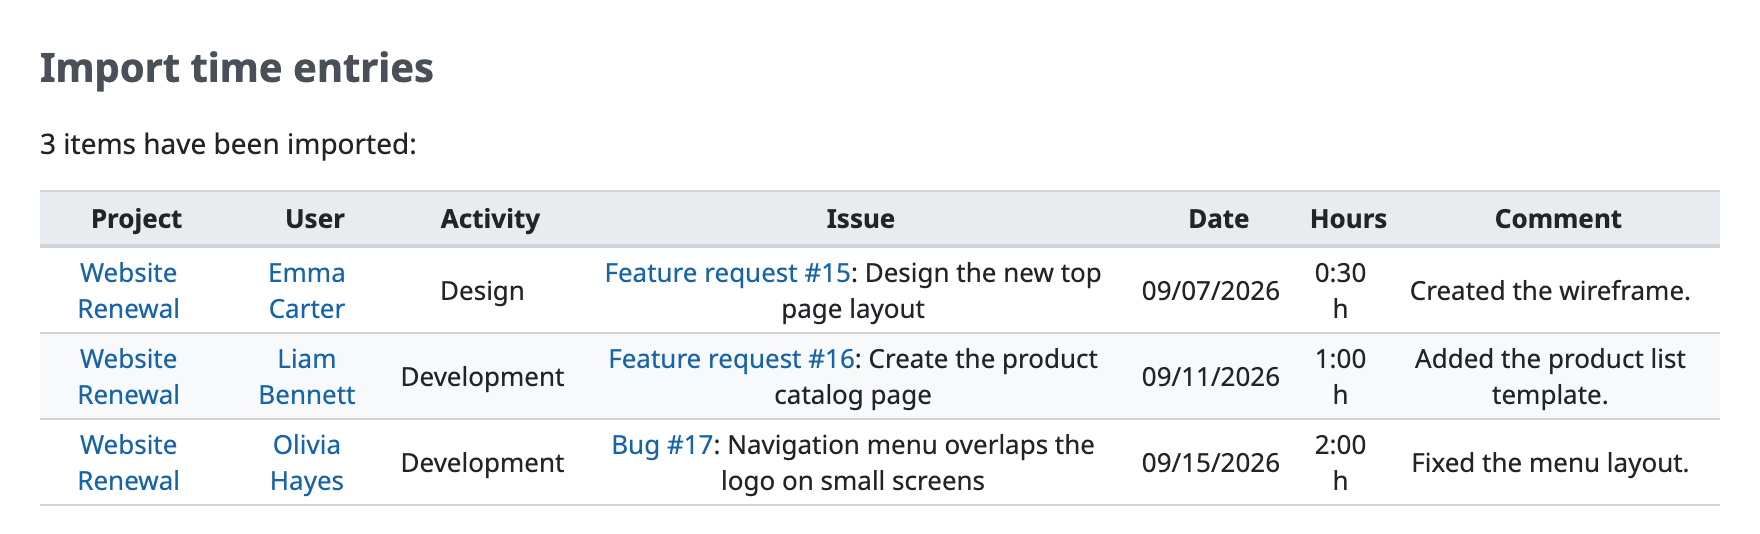
6. The import succeeds
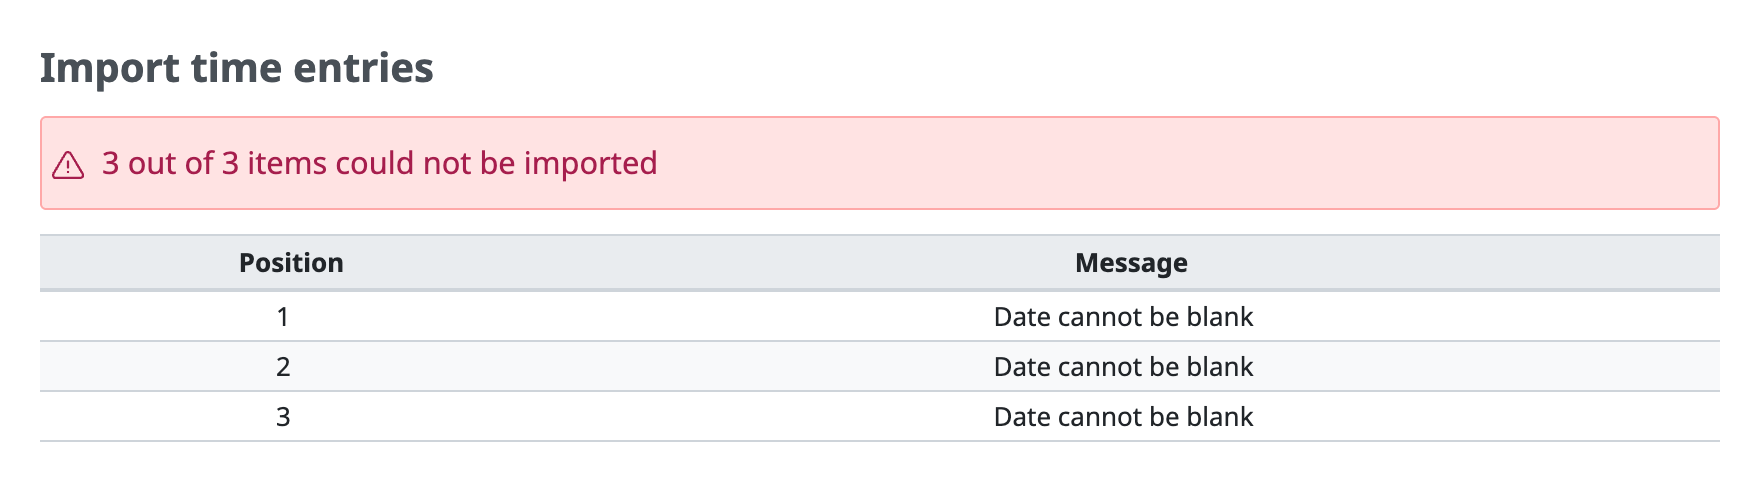
Example of a failure
If the CSV data is not sufficient, for example when a required field is empty, Redmine displays the reason why the import fails.
Related information