Registering Redmine users in bulk with CSV import
Updated on 2021-06-07
•
Created on 2020-12-17
•

Applicable versions: RedMica 1.2 / Redmine 4.2 or later
When you register users in Redmine, you can register multiple users at once by importing a CSV file.
① Create a CSV file for user registration
Create a CSV file that contains the information of the users that you want to import (login, first name, last name, email address, password, and so on).
Download the sample CSV file
Download the sample CSV file for Excel (with BOM, so that Excel reads it as UTF-8)
You can specify the following items. Add only the items that you need to the CSV file.
| Item | Value | |
|---|---|---|
| Login | Login | Enter the login that the new user uses to log in. |
| First name | First name | Enter the first name of the user. |
| Last name | Last name | Enter the last name of the user. |
| Email address | Enter the email address of the user. Update notifications and other messages are sent to this address. | |
| Language | ja, en, and so on (ja: Japanese, en: English) | You can specify the display language for each user. If you do not specify it in the CSV file, the user is registered with the language that is set in "Default language" on the "Display" tab of "Administration" → "Settings" in the top menu. Redmine.JP FAQ: The "Default language" setting and what it affects |
| Administrator | yes | You can specify whether to register the user as an administrator. If you do not specify it in the CSV file, the user is registered with "No". |
| no | ||
| Authentication mode | Name of a registered LDAP server | If you have configured LDAP authentication, you can specify which authentication to use: authentication with the user name and password of the LDAP server, or authentication with the login and password that are set in Redmine (Internal). If you do not specify it in the CSV file, the user is registered with "Internal". |
| Internal | ||
| Password | Password | You can specify the password that the user enters to log in. |
| Must change password at next logon | yes | You can specify whether to force the added user to change the password at the first login. If you do not specify it in the CSV file, the user is registered with "No". |
| no | ||
| Status | active | You can specify one of the following statuses for the user: active, registered, or locked. If you do not specify it in the CSV file, the user is registered with the "active" status. If you want the user to be able to log in and use Redmine immediately after registration, you do not need to specify this item. • active • registered • locked |
| registered | ||
| locked | ||
| Custom field | Value of the custom field | You can specify the values of custom fields that are added to the user object. |

Setting default values for new Redmine users
② Upload the CSV file and import the users
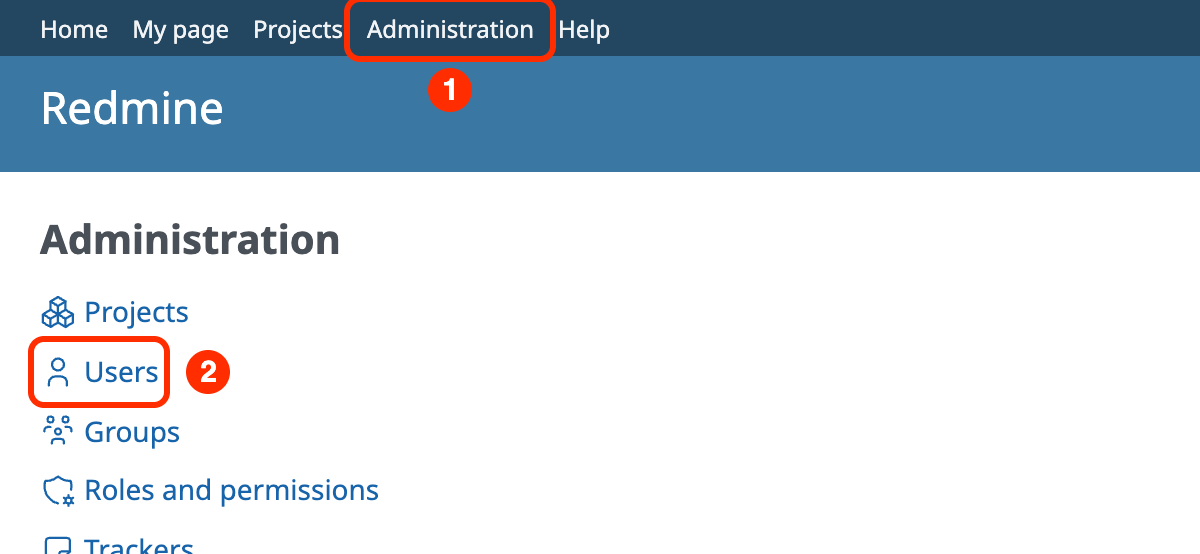
1. Open "Administration" → "Users" in the top menu
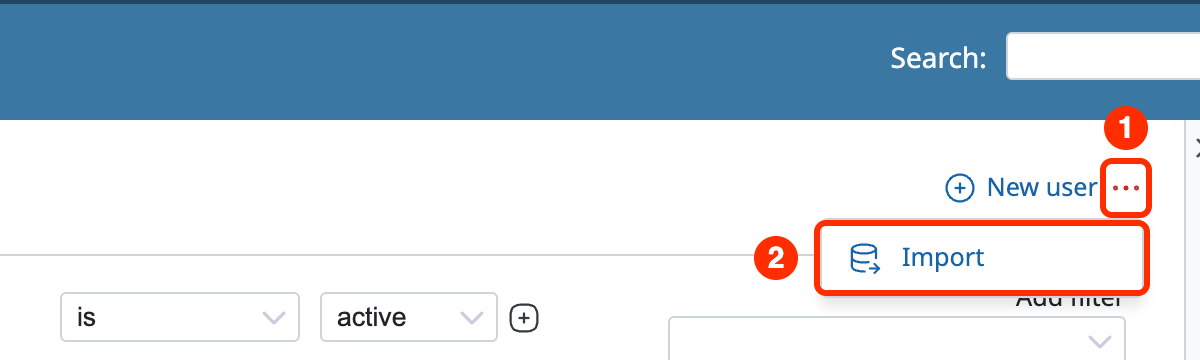
2. Click "…" next to "New user" and select "Import"
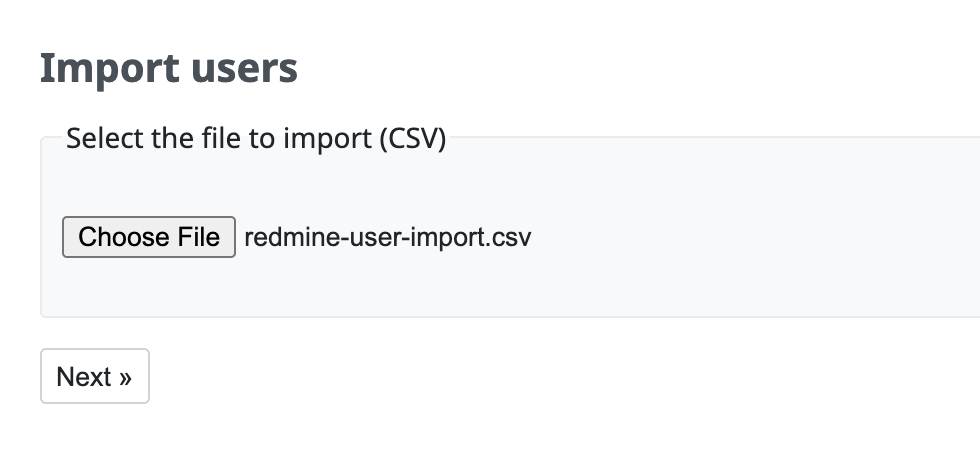
3. Click the file selection button, select the CSV file that you created, and click "Next"
4. Change the "Options" to match the format of the CSV file and click "Next"
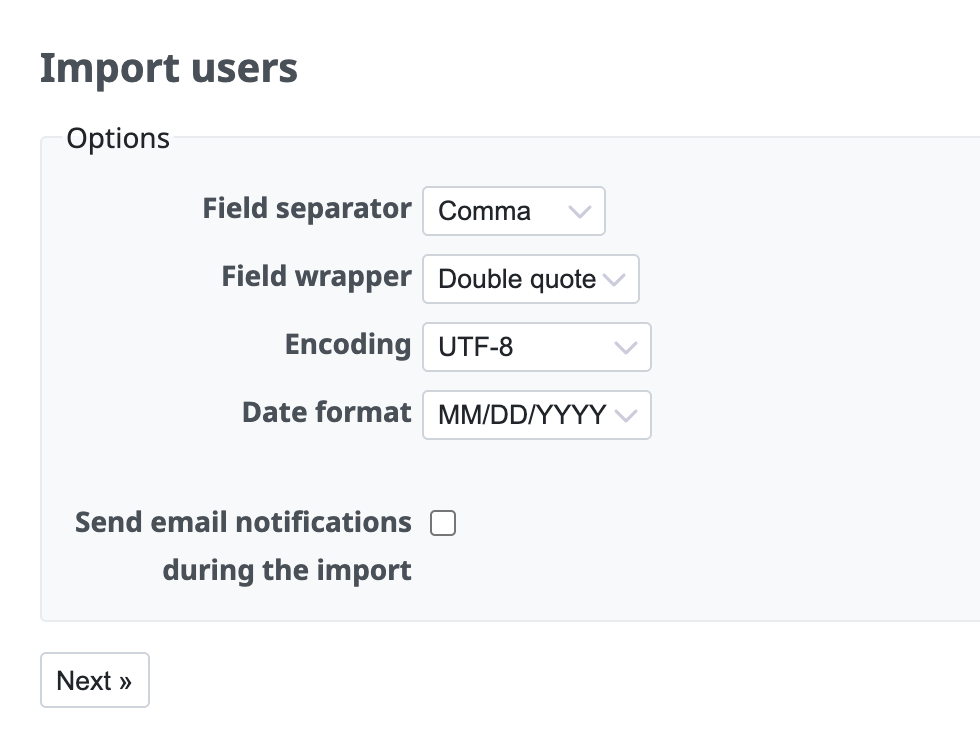
If you check "Send email notifications during the import", an email with the login information is sent to each registered user.
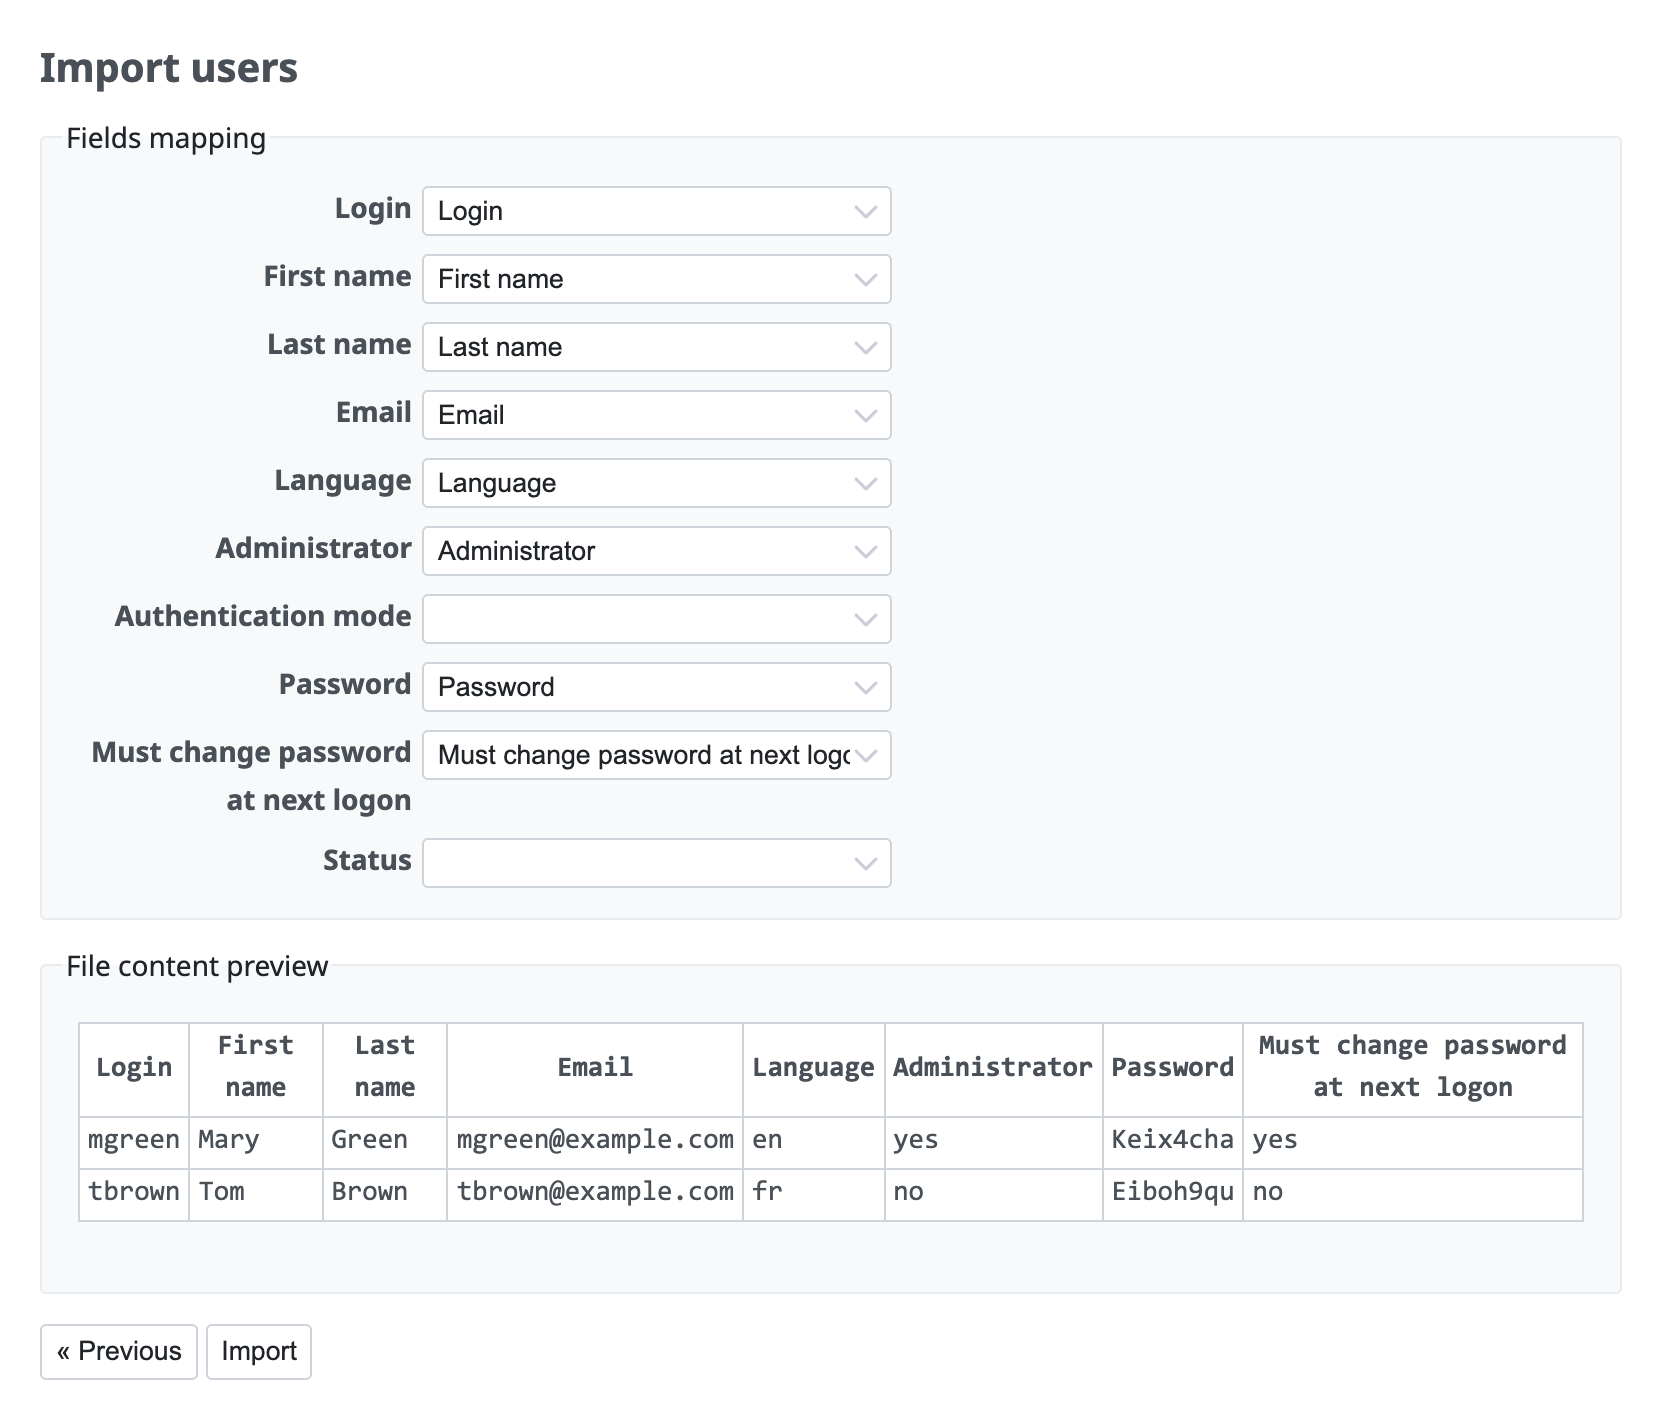
5. Redmine automatically sets which user field each column of the CSV file corresponds to. Check that the mapping is correct and click "Import"
6. After the import is complete, a list of the registered users is shown
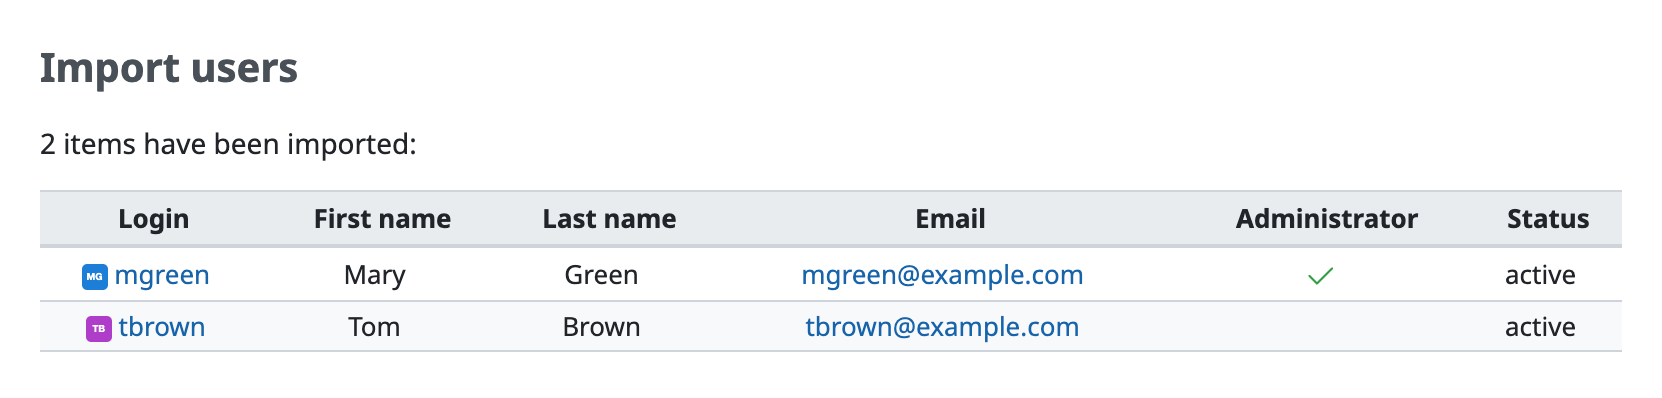
Click a login and check that the user information is registered as you expected.