Locking and unlocking a Redmine user
Updated on 2024-08-01
•
Created on 2023-03-31
•

When a Redmine user stops using Redmine, for example because of a transfer or retirement, "lock" the user so that the user cannot access Redmine.
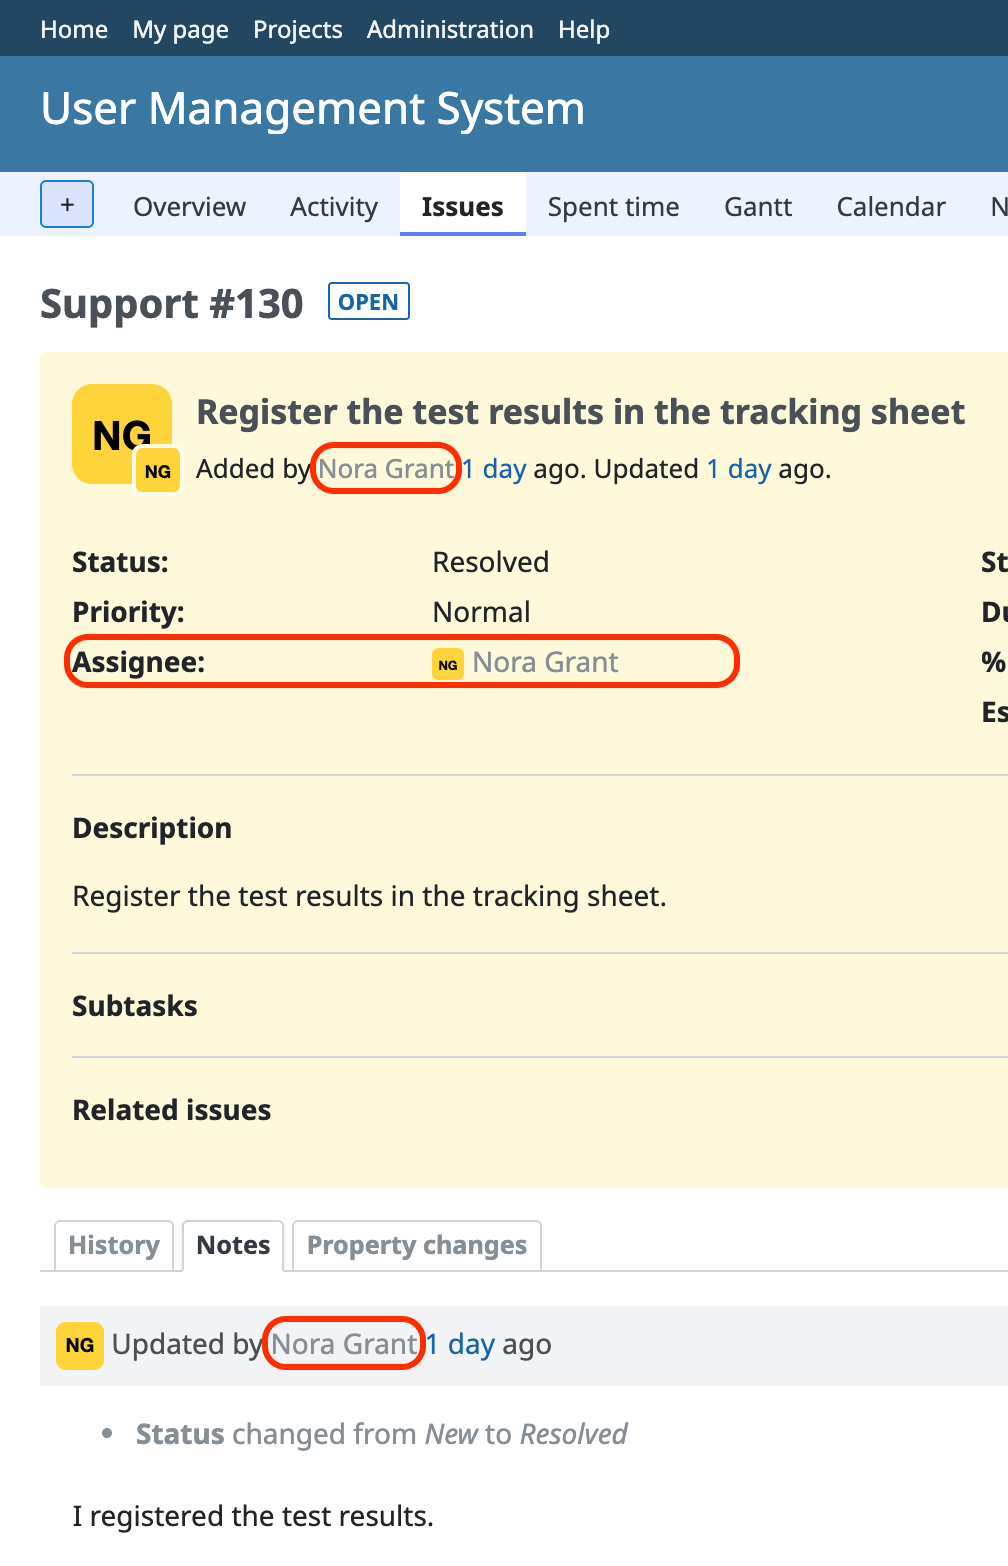
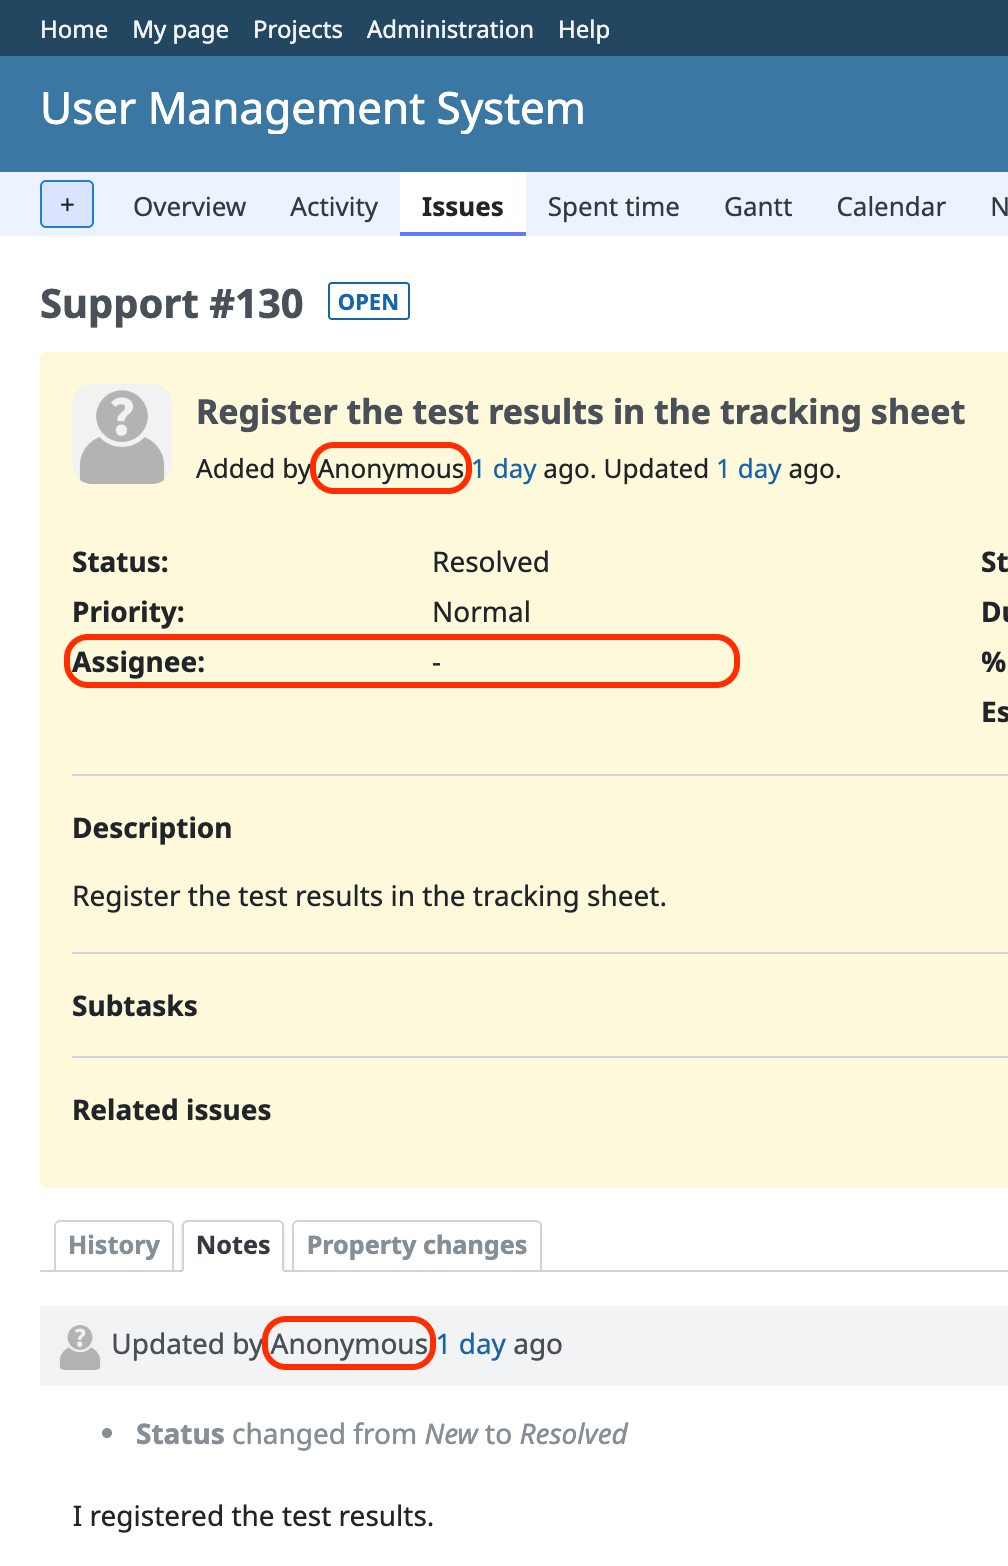
Redmine has two features that stop a user from accessing Redmine: "Lock" and "Delete". If you delete a user, information such as the history of the issues that the user updated loses the name of the user. If you lock a user, the history remains and the user cannot access Redmine.
| Lock | Delete |
|---|---|
 |
 |
|
|
How to lock a user
- Open the "Administration" → "Users" screen
- Click "…" (Actions) of the user that you want to lock
- Click "Lock" in the drop-down menu
How to lock multiple users at once
Redmine 6.0 / RedMica 3.1 or later
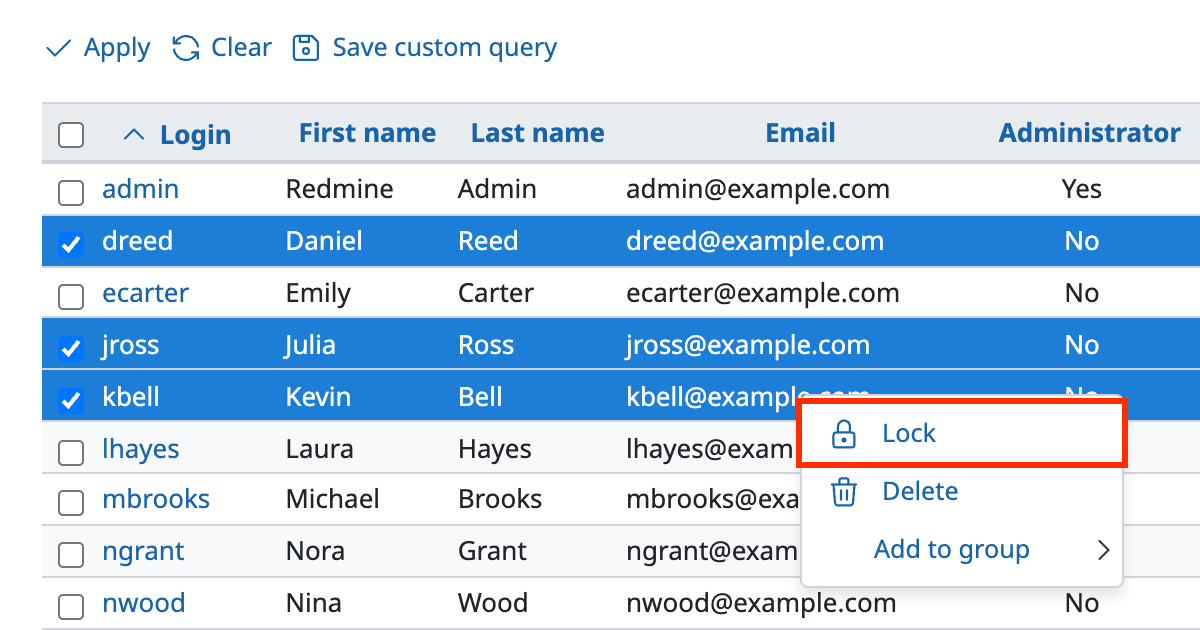
- Open the "Administration" → "Users" screen
- Check the checkboxes of the users that you want to lock
- Click "…" (Actions) or right-click
- Click "Lock" in the drop-down menu
Redmine 5.1 / RedMica 2.2 or later
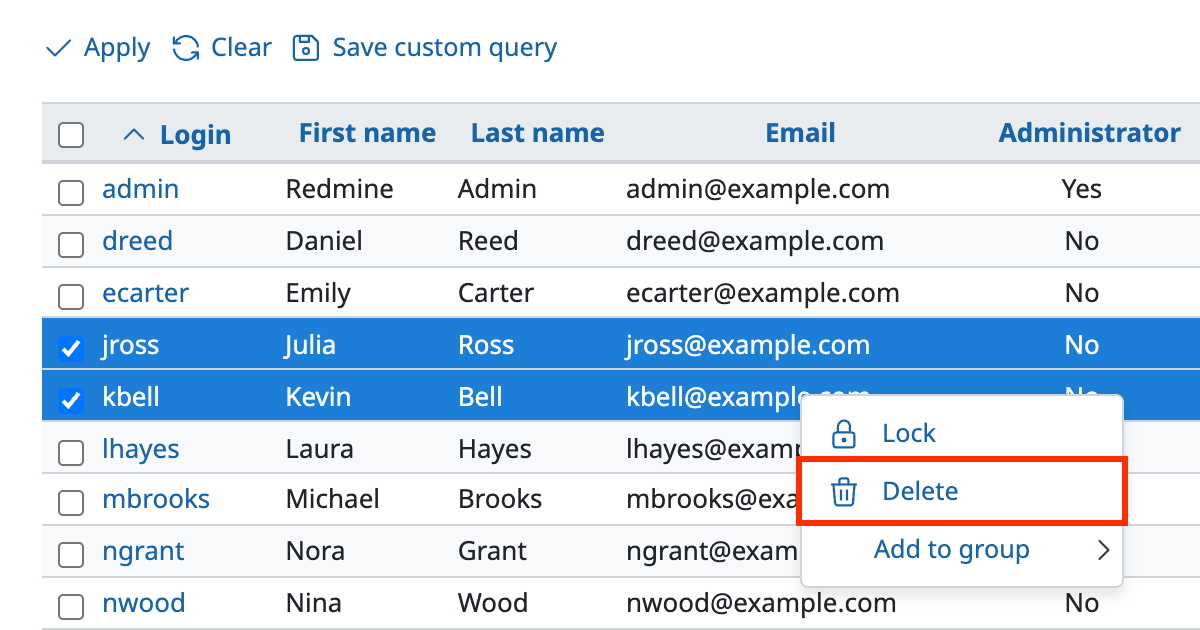
- Open the "Administration" → "Users" screen
- Check the checkboxes of the users that you want to lock
- Click "…" (Actions) or right-click
- Click "Delete" in the drop-down menu (this operation does not delete the users). In these versions, the drop-down menu does not have the "Lock" item that appears in the screenshot below, which was taken with a newer version
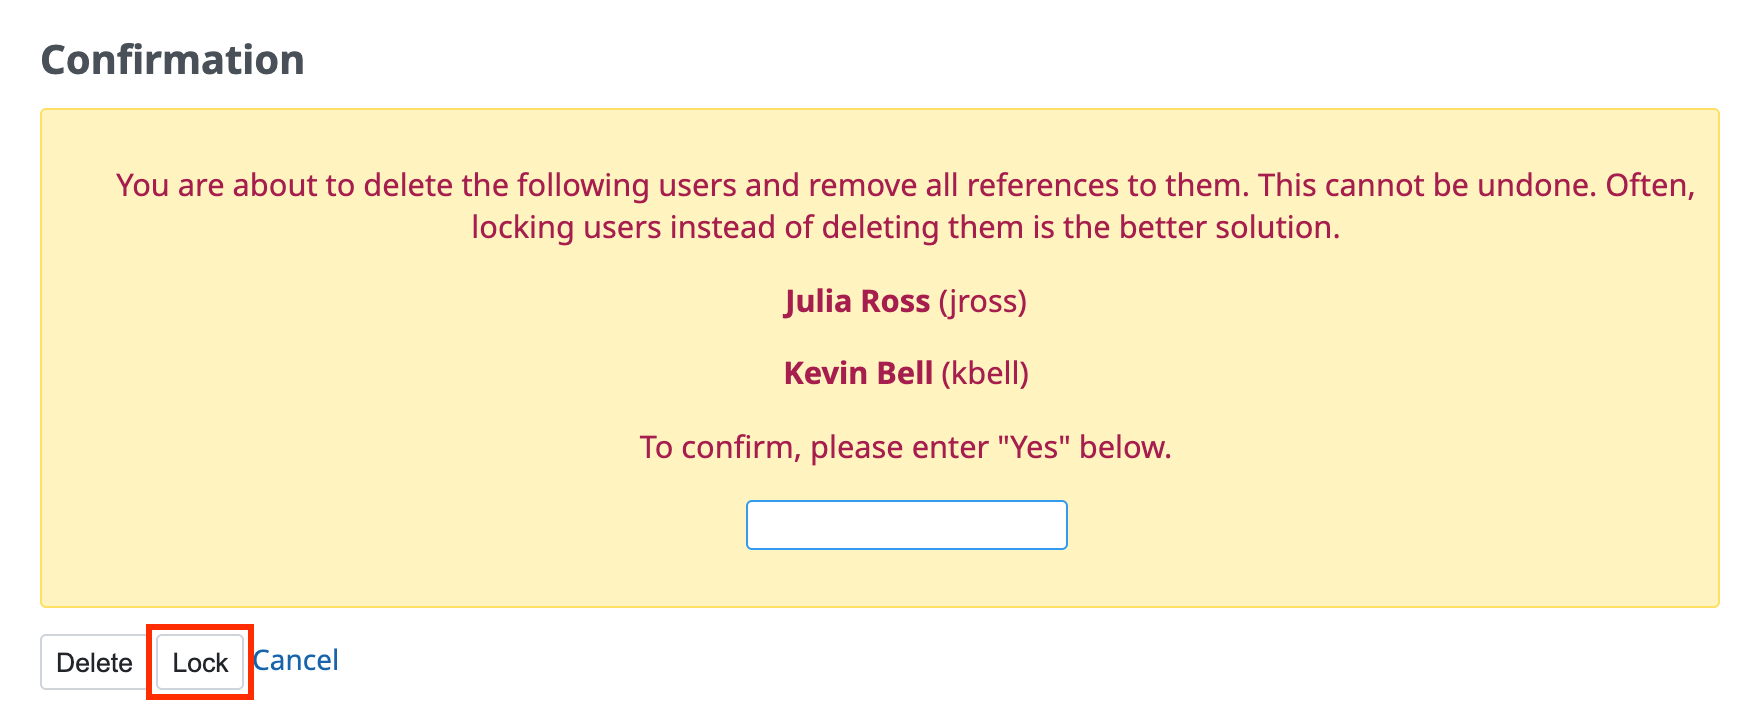
- Click "Lock" at the bottom of the confirmation screen that is shown
How to unlock a user
- Open the "Administration" → "Users" screen
- Change the Status filter to "locked" and click "Apply"
- Click "…" (Actions) of the user that you want to unlock
- Click "Unlock" in the drop-down menu
How to unlock multiple users at once
Redmine 6.0 / RedMica 3.1 or later
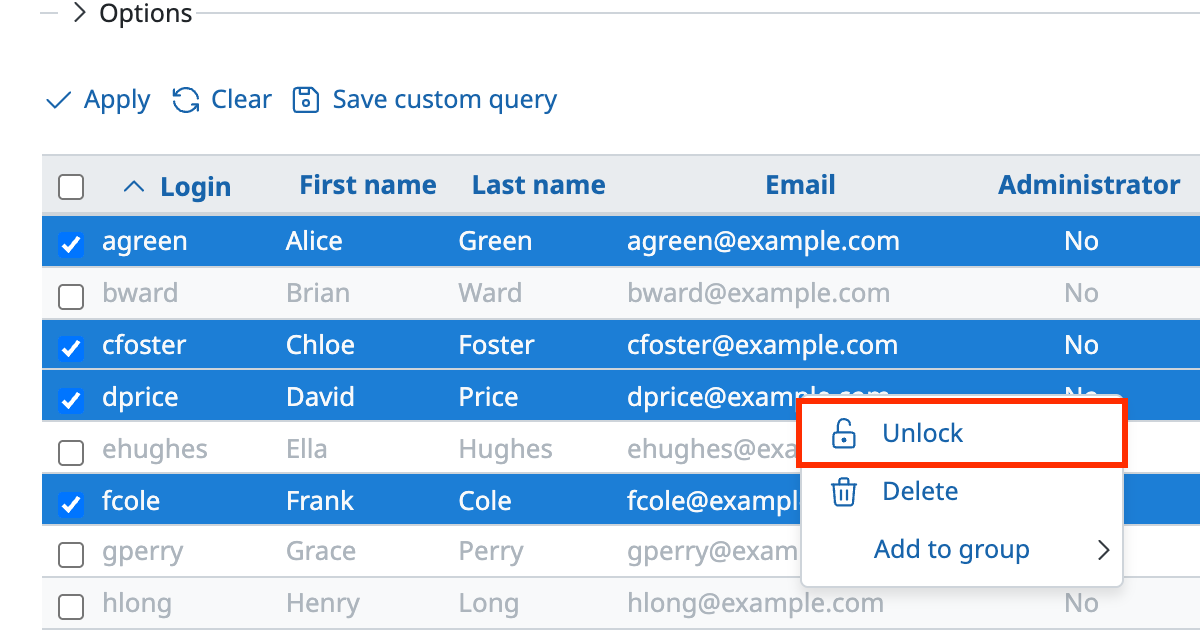
- Open the "Administration" → "Users" screen
- Check the checkboxes of the users that you want to unlock
- Click "…" (Actions) or right-click
- Click "Unlock" in the drop-down menu
Related information