Adding a new wiki page in Redmine
Updated on 2023-07-12
•
Created on 2008-04-30
•

This page explains the steps to add a new wiki page to a Redmine project.
①Create the start page (when you use the wiki in the project for the first time)
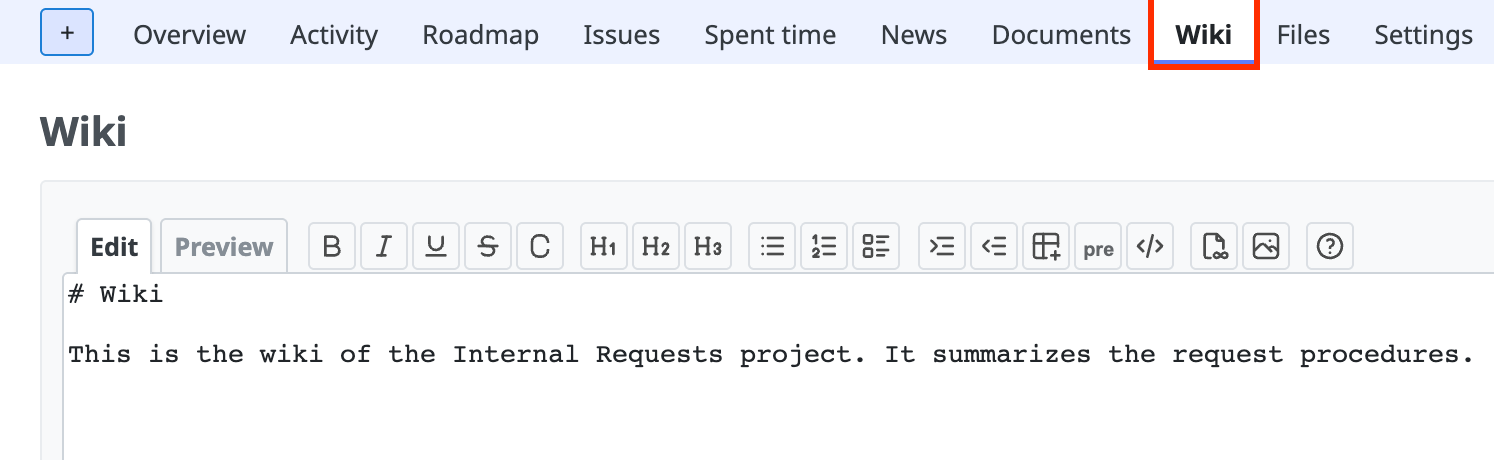
The start page is the page that is displayed first when you click "Wiki" in the project menu. You can also think of it as the top page of the wiki of the project.
- Click "Wiki" in the project menu. When you use the wiki for the first time, the edit screen of the start page is displayed.
- Enter the content of the start page and click "Save" at the lower left of the screen.
②Add a new wiki page
Redmine 3.3.0 or later
After you create the start page, add a new wiki page.
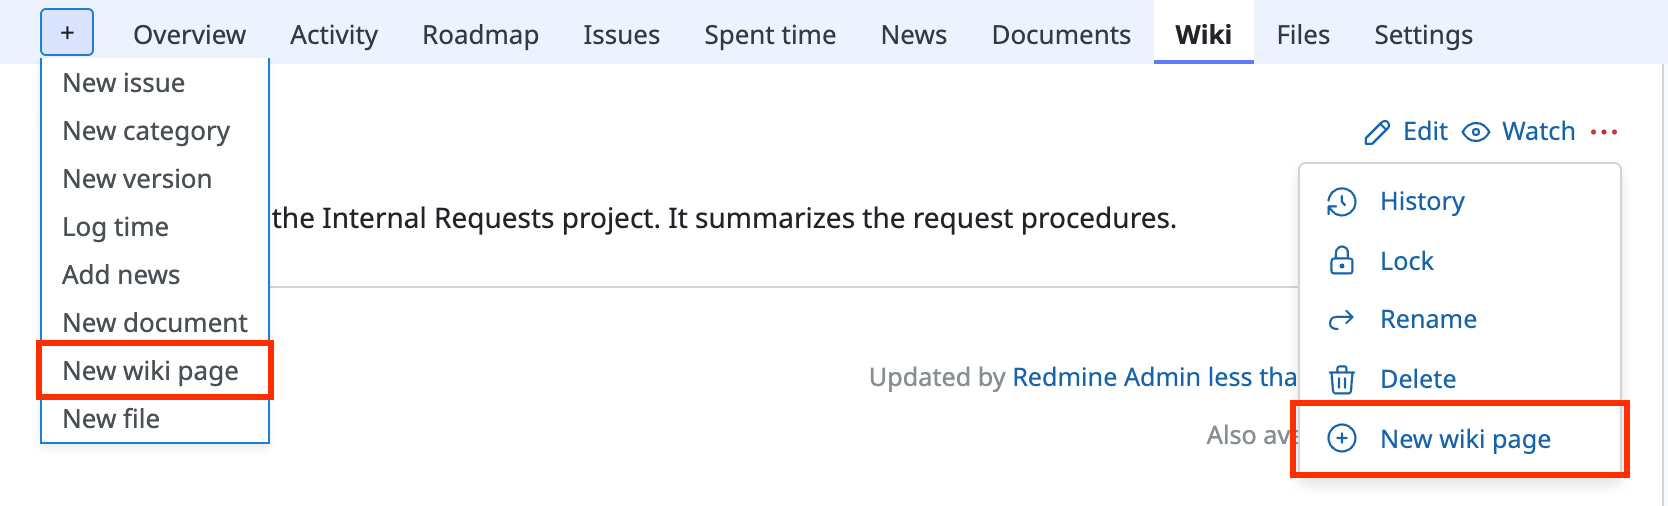
Click "New wiki page" in the "+" drop-down or in "..." (Actions).
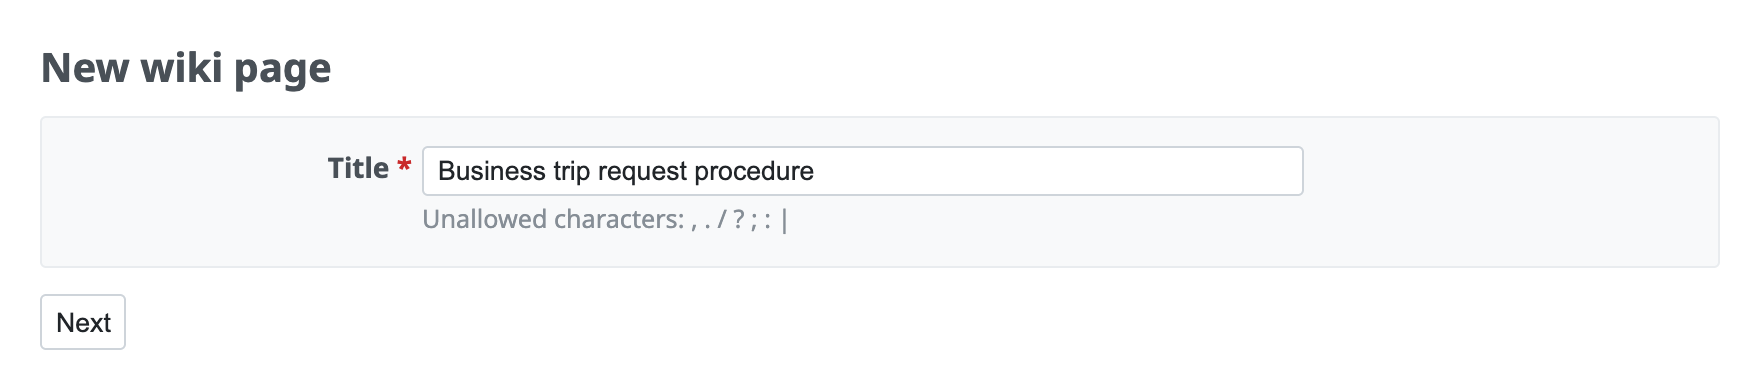
Enter the title of the wiki page that you want to add and click "Next".
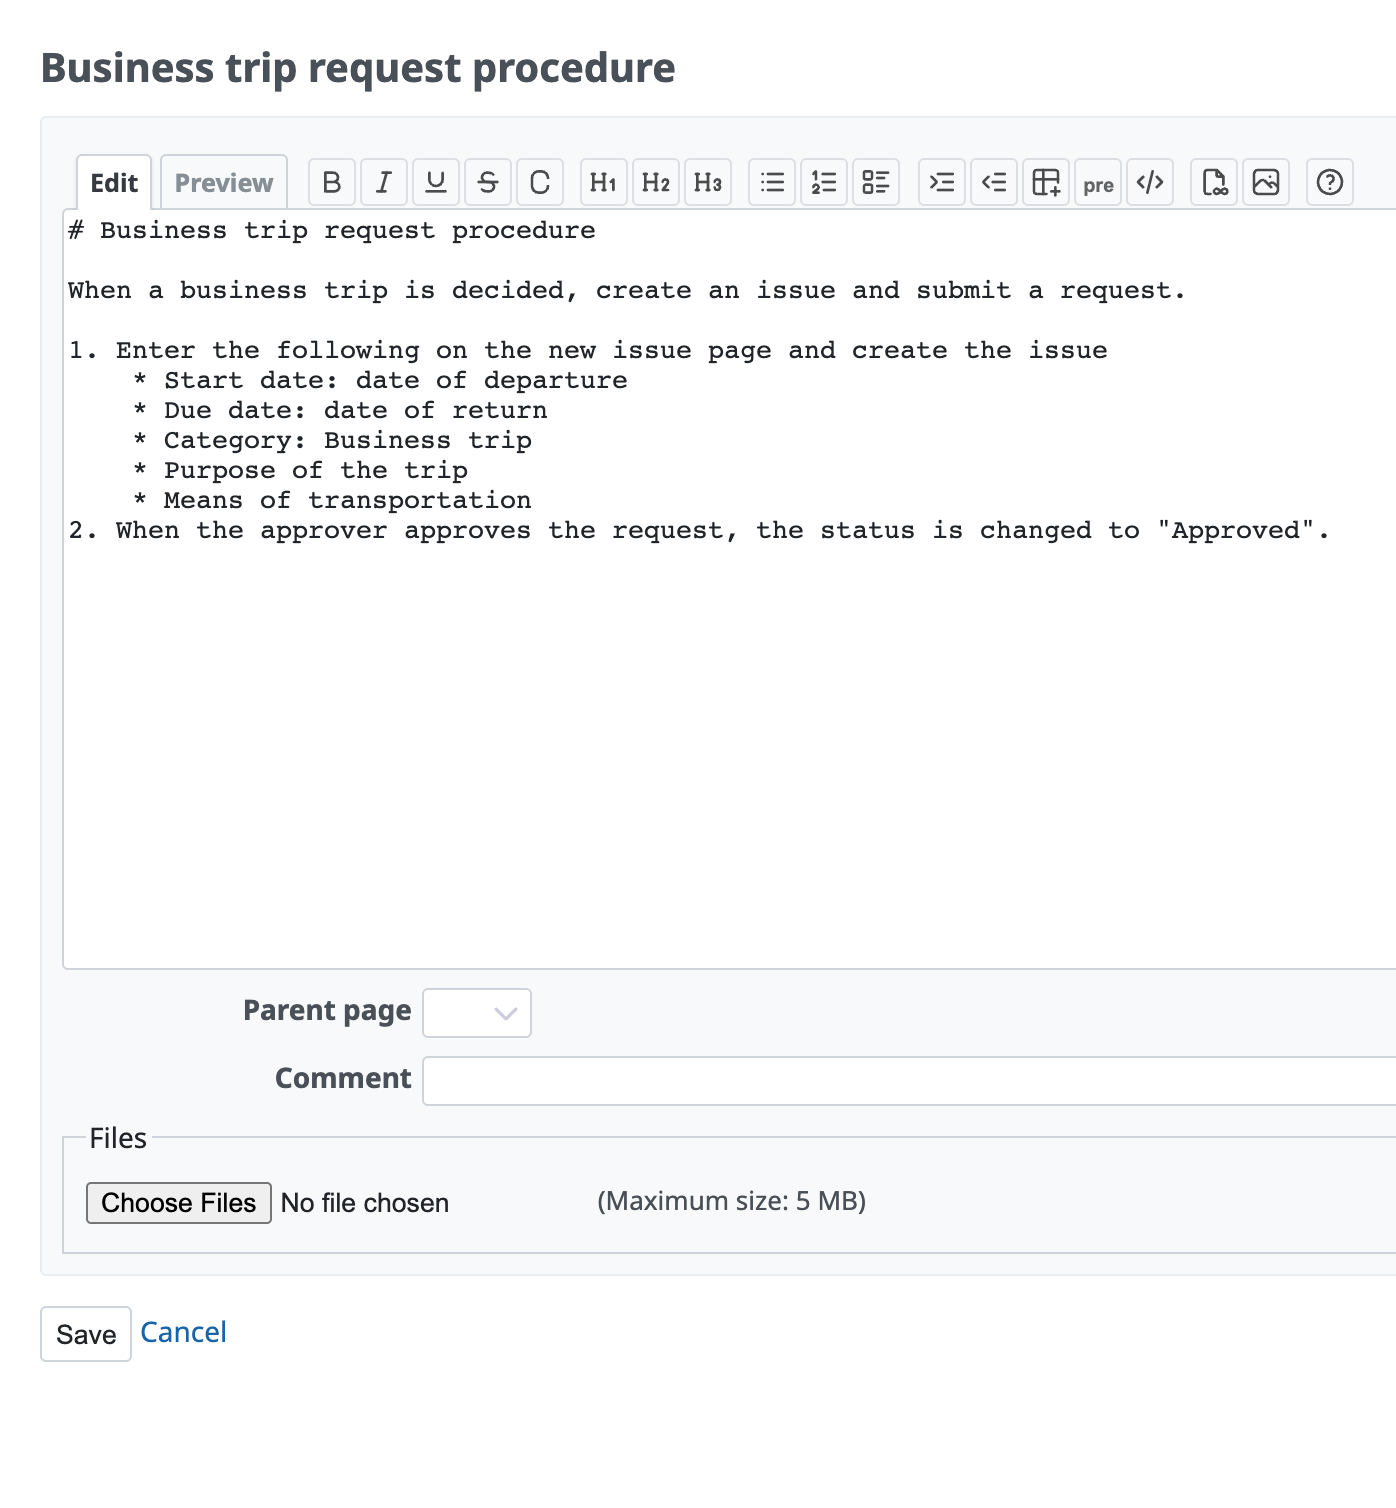
The edit screen of the wiki page is displayed with only the title. Enter the content that you want to record below the title and click "Save".
Versions earlier than Redmine 3.3.0
Versions earlier than Redmine 3.3.0 do not have the "New wiki page" button.
Create a link to the new page in an existing page. Then click the link to open the edit screen of the new page.
Steps
- In the edit screen of an existing wiki page, write a link to the page that you want to create, such as
[[New page]], and save the page. - When you display the saved page, a red link
New pageappears (the page is not yet created at this point). Click the link. - The edit screen of the wiki page is displayed. Enter the content there and save it to create the page.