Cannot enter the Category or Target version of a Redmine issue
Created on 2015-11-18
•

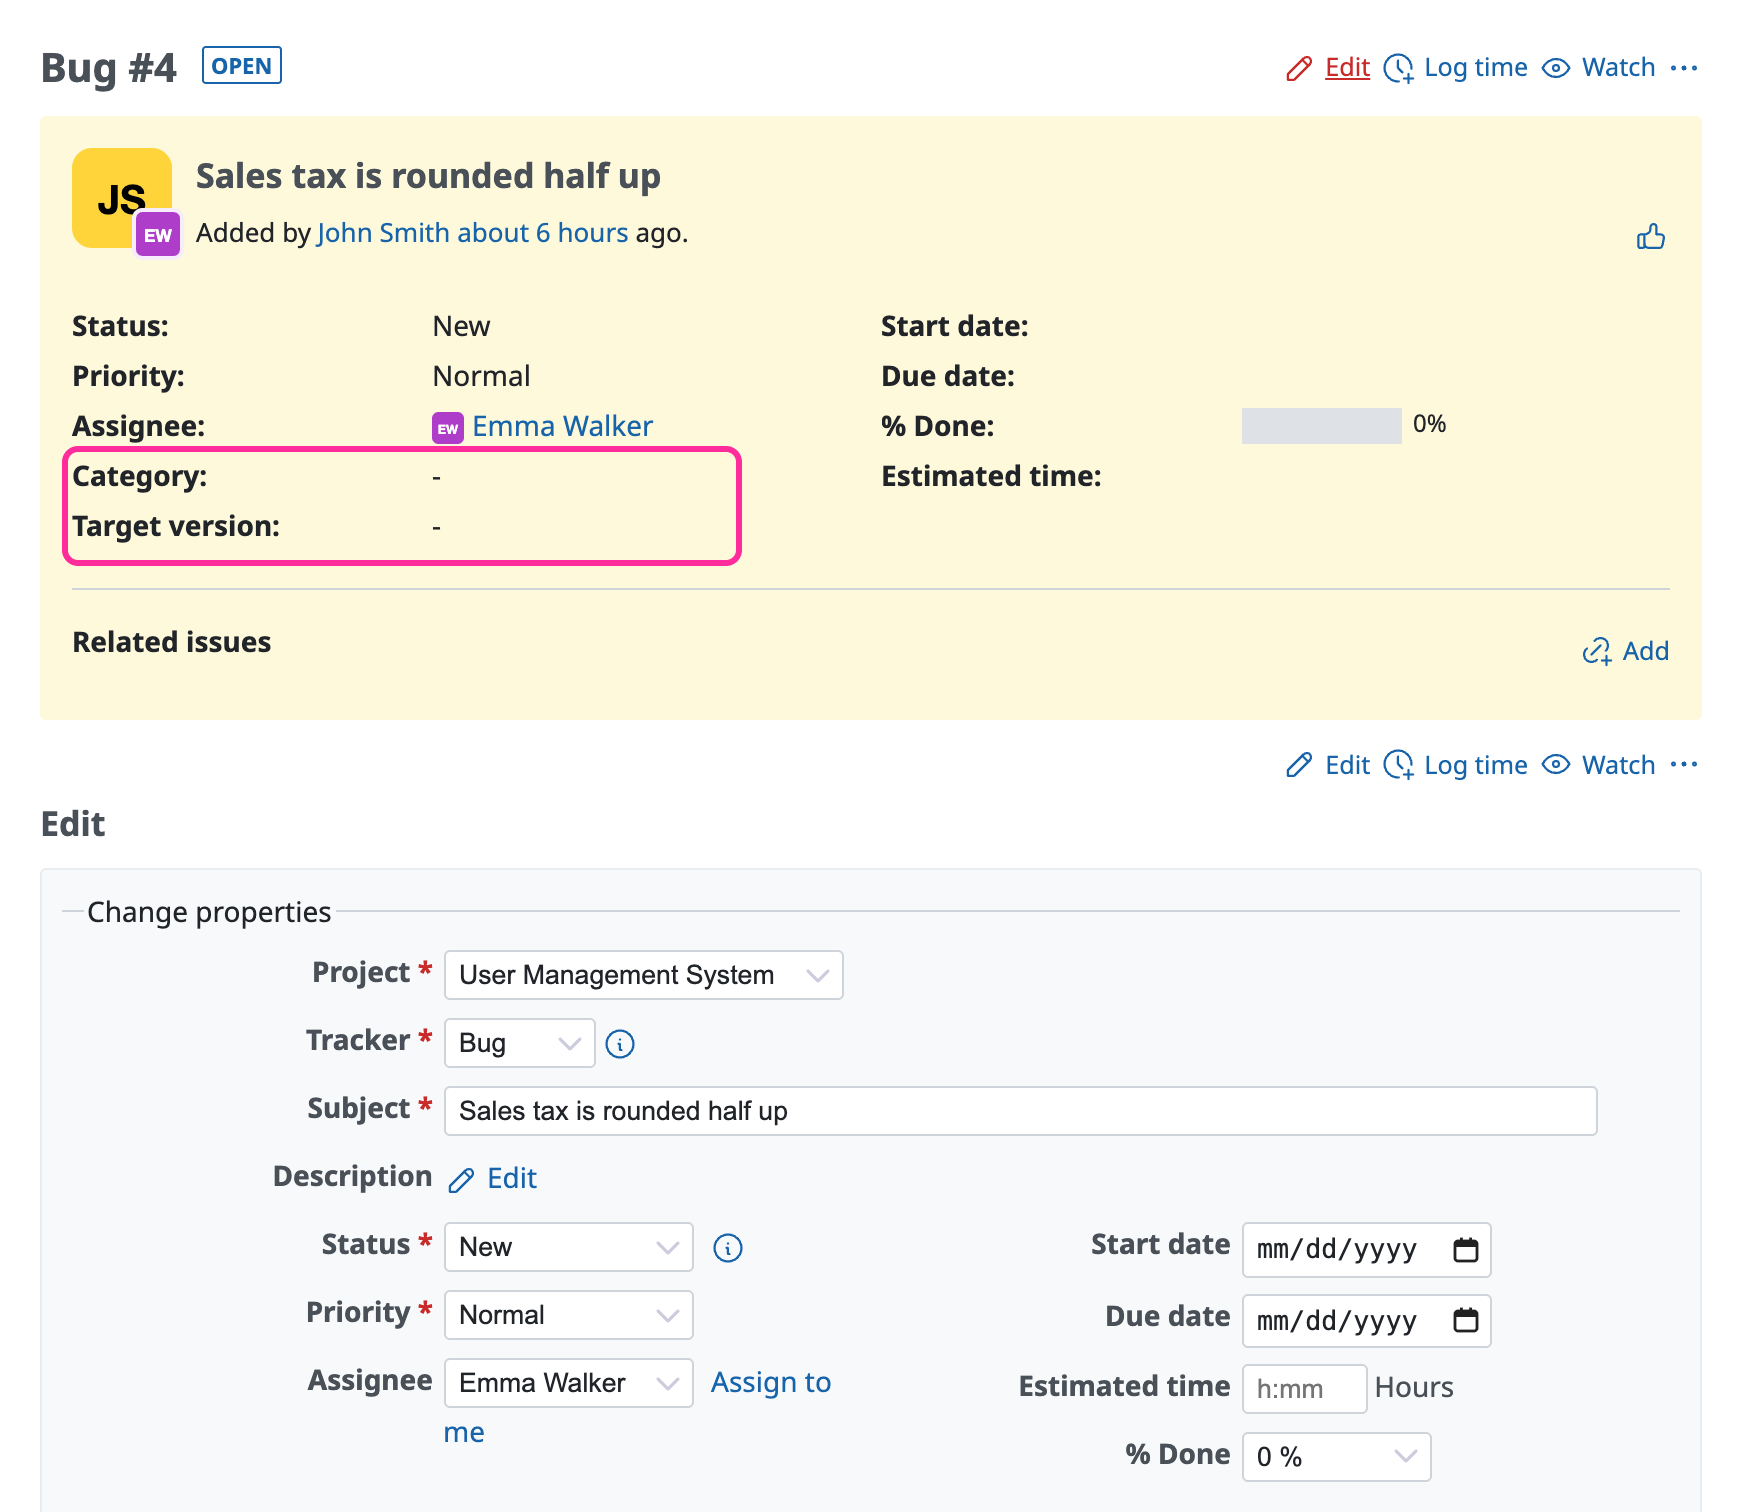
The "Category" and "Target version" fields may not appear on the page to create or edit an issue, and then you cannot enter them. In some cases, as in the following image, the issue page shows these fields but the edit form does not. The following two causes are possible.
- "Category" or "Target version" has not been created
- The settings do not give you permission to edit the fields
1. "Category" or "Target version" has not been created
If the project has no "Category" or no "Target version" that can be selected, the field appears neither on the page to create or edit an issue nor on the issue page. Please create the options in advance on the settings page of the project.
How to create a "Category"
- Open the "Settings" → "Issue categories" tab of the project
- Click "New category"
- Enter the name and click "Create"
How to create a "Target version"
- Open the "Settings" → "Versions" tab of the project
- Click "New version"
- Enter the name and click "Create"
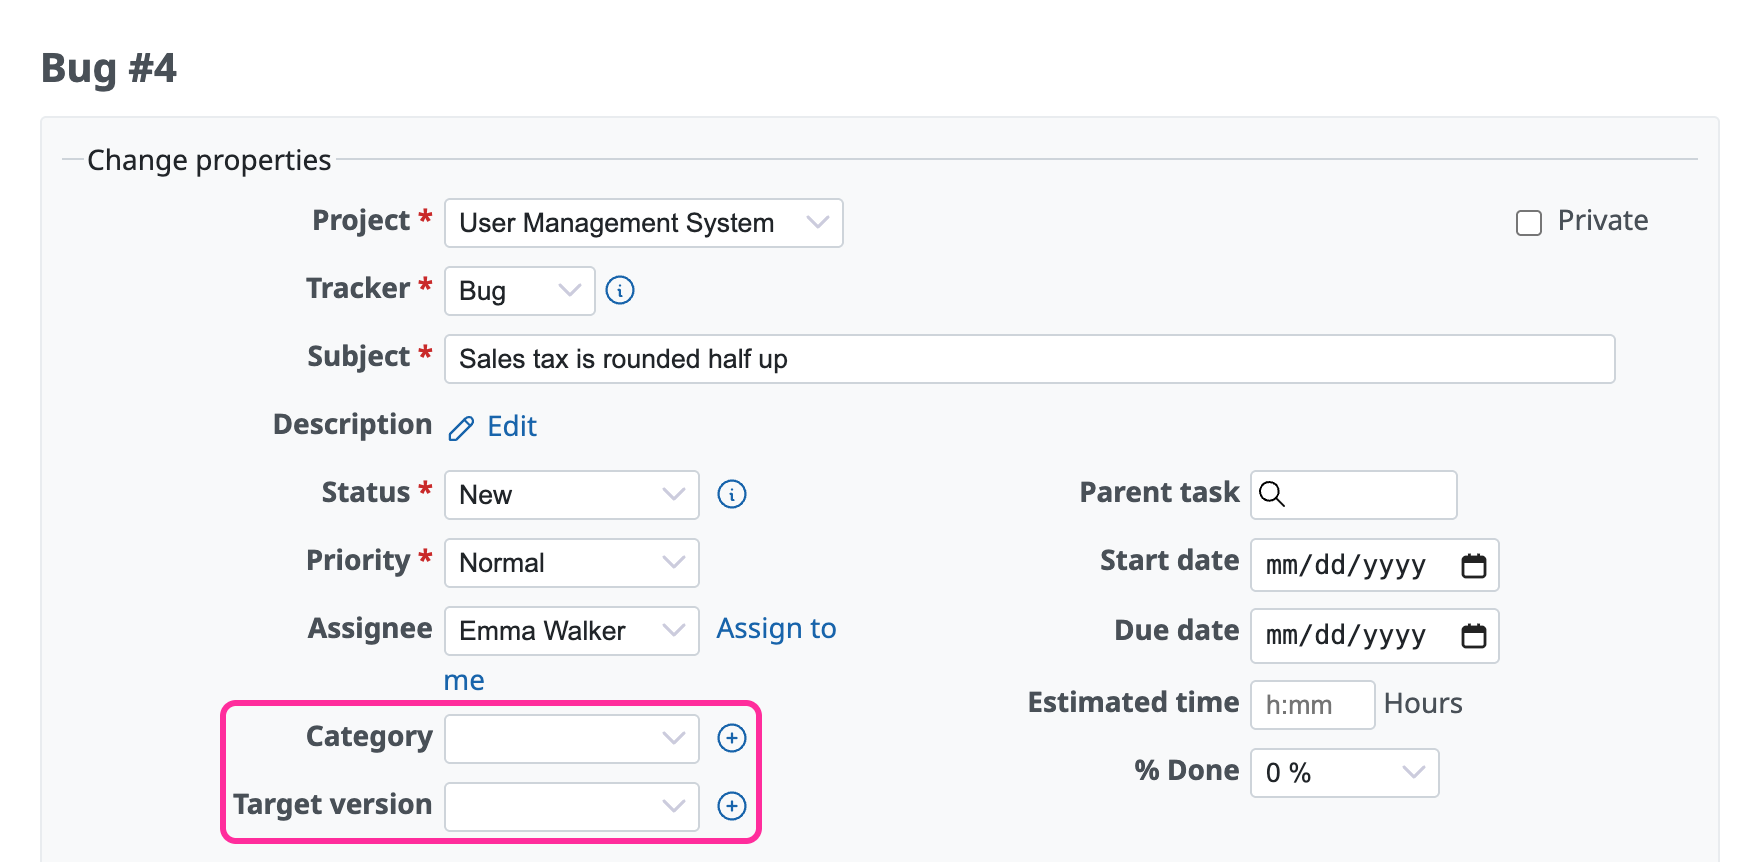
For both "Category" and "Target version", after you create the first one, you can create more by clicking the plus icon (a plus sign in a circle) to the right of the field on the page to create or edit an issue.
2. The settings do not give you permission to edit the fields
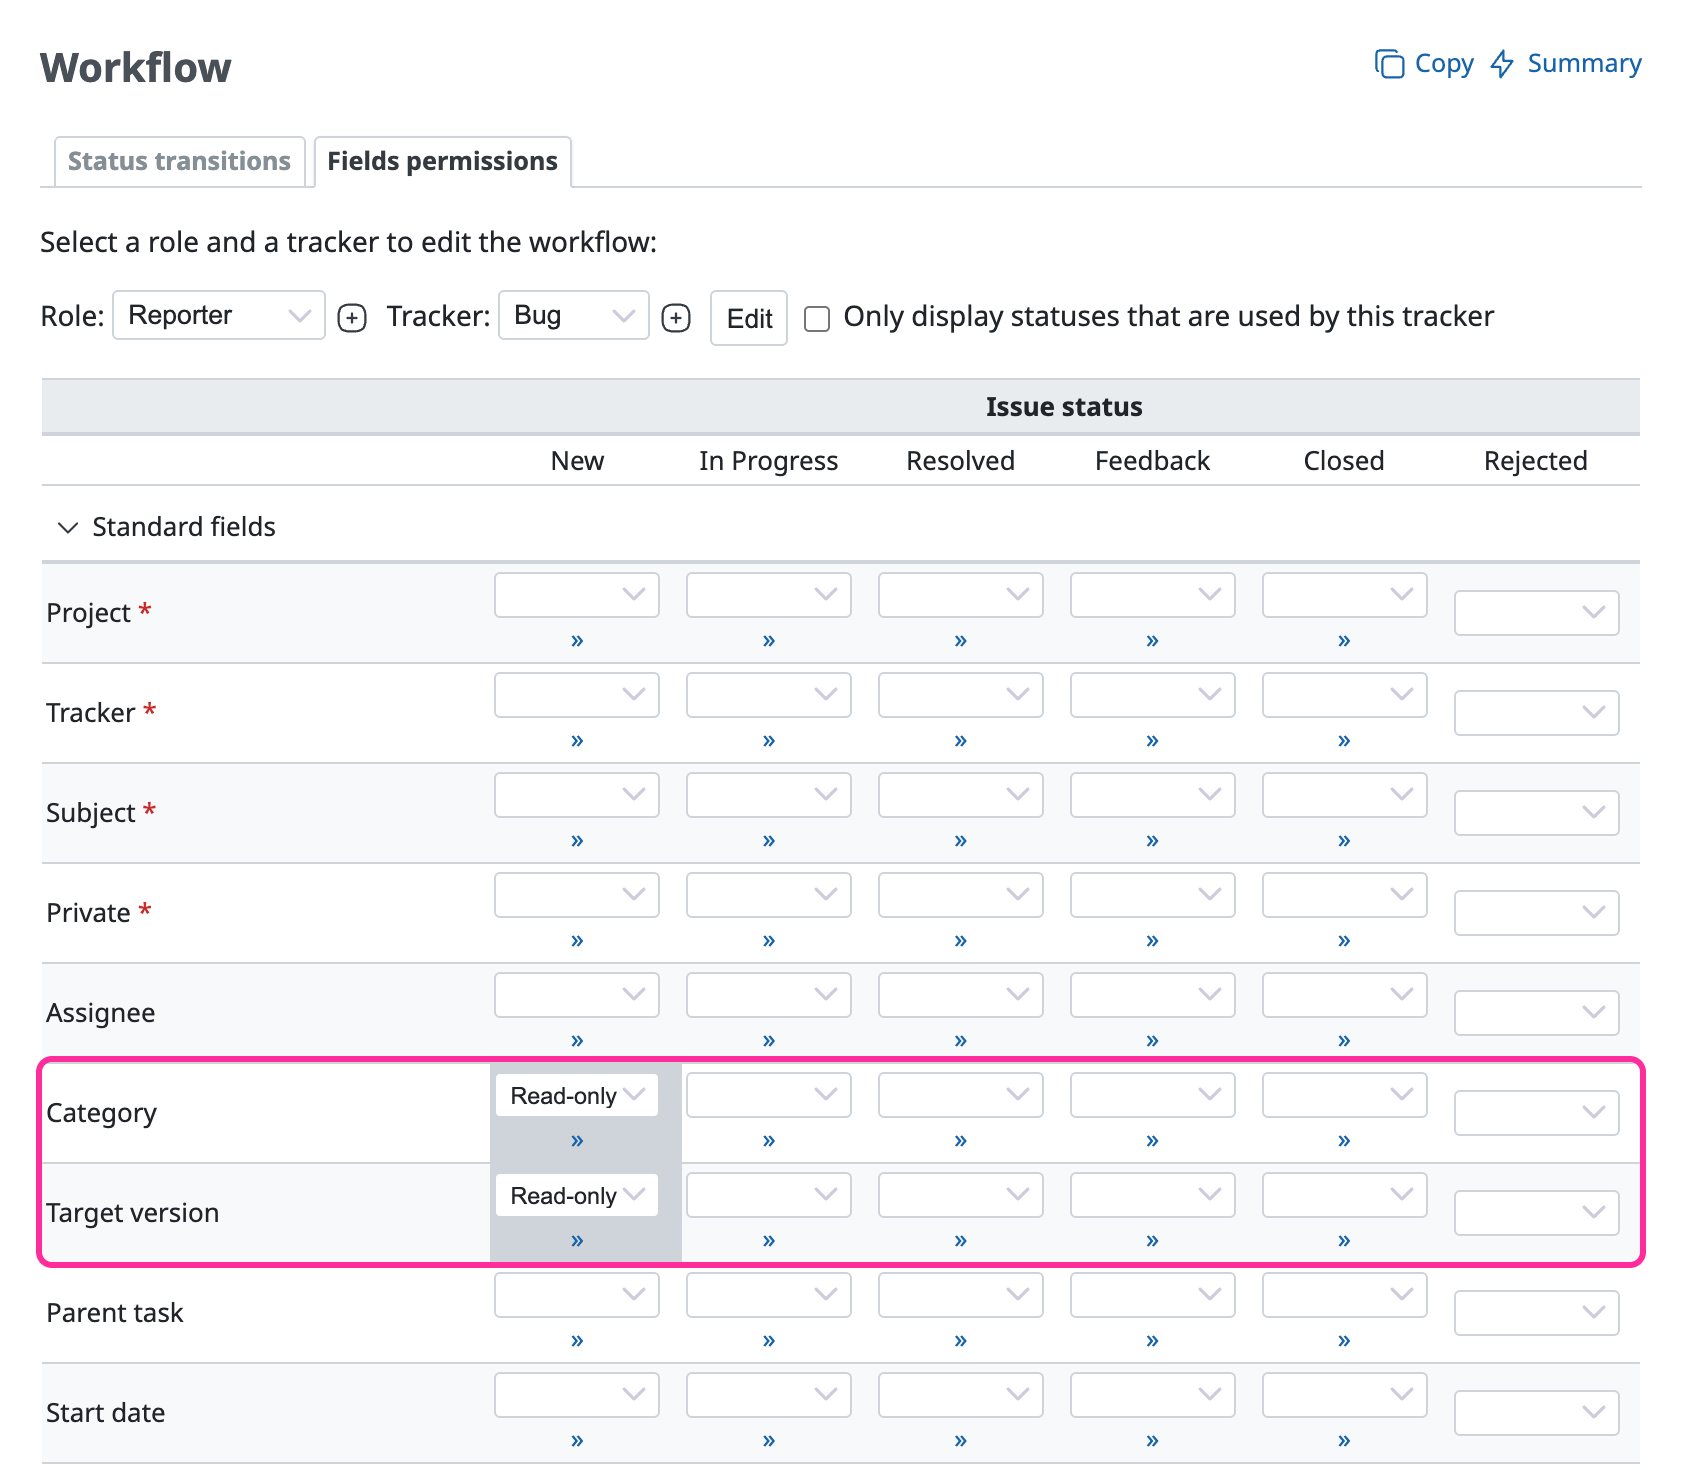
If "Target version" and "Category" appear on the edit page for some users and not for others, the workflow settings may prevent some users from editing them. If "Read-only" is set for these fields in "Fields permissions" of the workflow, the users have no permission to edit them, so the fields appear on the issue page but do not appear on the edit page.
Workflow settings
- Open the "Administration" → "Workflow" → "Fields permissions" tab
- Select the role and tracker of the user for whom the fields do not appear, and click "Edit"
- Check that "Category" and "Target version" are not set to "Read-only"
- If they are set to "Read-only", select the blank option and click "Save"